Let’s talk chairs, shall we? I recently admitted to my sibs over some beverages that I have a serious chair problem. Now that they know, the interwebs is the next obvious place to say this. A chair problem? You ask. A chair problem.
Several years ago I had an old dining room set with tall chairs that weren’t really my style and they made the room seem smaller. Eventually the table needed refinishing and I realized I didn’t like it enough to spend the effort to re-do the set. So I sold it on Craigslist and started looking for replacements.
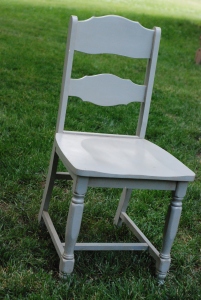 My elderly neighbor sold me two chairs for $5 each. I loved them the minute I saw them. They needed repainting but these things were solid, elegant, had nice legs. Mmmm chairs. I scoured garage sales, thrift stores, and craigslist for weeks looking for more chairs to finish out the set. I found three that were fine but I didn’t love, but at $5 a chair, they seemed to do the job. I actually ended up passing those on to a friend who bought a dining room set that matched them almost perfectly!
After weeks of searching, I finally found a set of four that 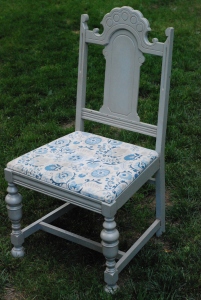 I couldn’t walk away from. Well I did at first because I thought they were asking way too much for them. But then it got awkward when I stopped 4 or 5 times to check on my chairs. As luck would have it, they went on a half off sale and they came home with me! Silly me thought I was just putting together a new dining room set, not the beginnings of a serious problem. I painted all six of the gray and reupholstered the four with seat cushions. I love these chairs. I use them constantly and still absolutely love them.
Last summer I wanted to find a couple chairs for the sewing room, to use as overflow, and another one for the desk. My friend and I went to a large and wonderful neighborhood garage sale and I left with 4 chairs for $8. Not chairs that made me drool, one is going to be a project / barn chair, the other three I could repaint and use for the desk and sewing room. Good plan, right?
…… and then I saw three of these at a thrift store. 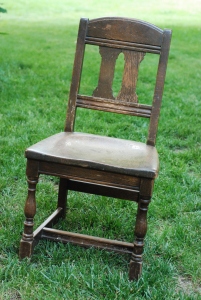 Drool. These weren’t just “oh I guess we could sit on these and make them work” chairs. These were gorgeous, old, sturdy, and lovely chairs. Where have you been all my life???? Again, I visited the overpriced chairs twice and then they went on sale. You’re mine at last!! Because I may have a chair problem, but not an overpriced chair problem. Once they went on sale, these were the chairs. So the cheapo make do chairs in the barn will be repainted and sold off because hello gorgeous! These ones are staying with me.
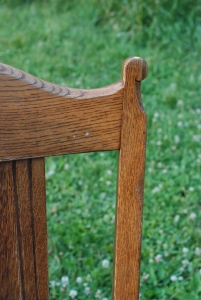
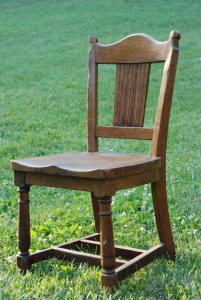 Six weeks later, I came across these two at a garage sale for a steal of a deal. Be still my beating heart. Two for $15. These beauties are rock solid and the wood detail. Sigh. As I told the woman I was buying them, she said her husband really didn’t want to sell them. “I understand completely,” I said and promised to take good care of them. As I was walking out of the garage with them, the husband said wistfully “Take care of my girls.” I will sir, I will.
The heart loves what it loves. And apparently mine loves sturdy, old, nice legs, curved bottoms, and some kind of interesting old detail on the chair backs.
I am learning some important lessons: Never settle for chairs you don’t love. Because girl, you will find some you LOVE and can’t leave without. Save yourself the trouble and buy no more “meh” chairs.
I’m also putting myself on an official chair ban. I’m not allowed to buy any more chairs until I fix up and get rid of those spare chairs in the barn. #chairban2016
Perhaps this is where I should also mention I am a single woman who lives alone. It does seem that 11 dining room chairs is probably enough until I fill those ones up. It gives a whole new meaning to this song . Maybe I just allow myself one more for an even dozen. That’s how many kids I want someday…
While I’m at it, I’m trying to figure out if I could make a living as a curator of beautiful chairs and petite china cabinets. Let me know if you hear of any openings– or if you need any chairs!!
And now you know.
I’m Reenie. I have a chair problem.


 In the past year, my few friends who had dogs basically had most of them die. First Chance, then Maggie, then Buck, then Pepper. All within a couple months of each other. I was ahead of the curve (knowing Maggie wasn’t going to be around much longer) so I got a puppy the same year. This year, however, seems to be the year of the puppy for my other friends. What is really funny is realizing that I am not ready for a new puppy. Once in awhile I have the crazy thought that a puppy would be great for Daisy because she’d have someone to romp with and maybe she’d leave poor old Suzie alone. Then I come to my senses and realize I am not ready for a puppy yet.


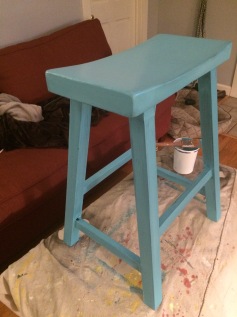 Around this time, I overreacted to the incredibly busy-ness of the last three weeks and scheduled myself at home. Every night. Because burn out, people, burn out. Work is insane. I had overscheduled my evenings for several weeks. And I needed home time more than anything else. So there I was, at home, in my paint sweats, and decided to paint this old Craigslist stool to turn it into a bedside table for the guest bedroom. A nice low key paint project that I could do in my living room, surrounded by dogs, while watching Fixer Upper. Hard to go wrong really. I paint the stool one night, wax it the following night, and then take it up to see how it fits into the bedroom.


 Saturday was an all out circus at my house. While I had the borrowed trailer, I picked up a bed from my friend’s house for my Grandpa who lives with my parents. So I visit with Bob, we load a bed, and I visit with my mom while we unload a bed. Then I head back home where Donal, Lindsey, and CK are already at my house and running the hills with the pups. They were over for a work day in the yard. An hour later, our friend Nick swings by. We were signed up to cook this meal for charity on Sunday (Nick and I each cooking part of the meal). He needed to drop off his portion on Saturday and I’d make the delivery the next day with my portion. So Nick stops to visit for a bit and then heads out.
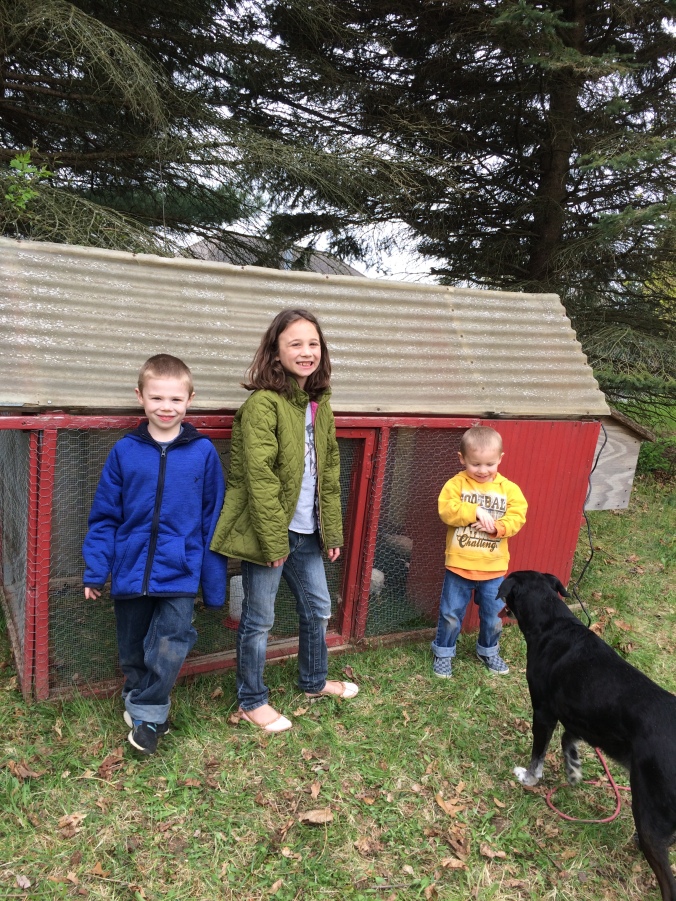 Suzie got quite excited and pawed at the coop a few times. I brought Daisy out on her own and did some down stay practice near the coop. Allowing her to see it but not go nuts about it. She was interested but much calmer than Suzie over the whole thing.
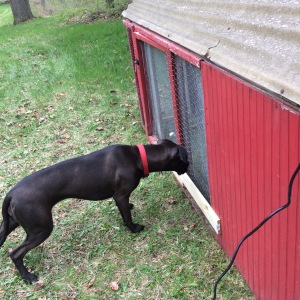


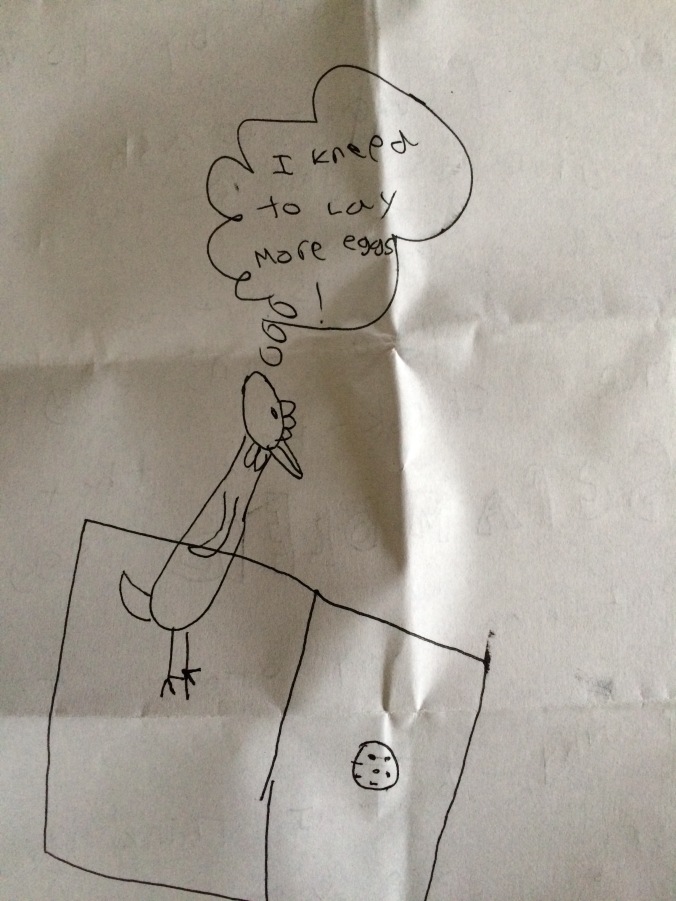
![Spring2012 012[4]](https://mylittlehouseonthehilltop.files.wordpress.com/2016/04/spring2012-0124.jpg?w=676) You may remember my last go at chickens in 2012 back in my city backyard with the awful neighbors. Mmm hmm. You may also remember that the only chickens that survived that experiment were the roosters I gave my mom (and I’m pretty sure they were eventually eaten by coyotes). Never one to learn lessons from a gruesome past, this spring I started thinking about chickens again.
You may remember my last go at chickens in 2012 back in my city backyard with the awful neighbors. Mmm hmm. You may also remember that the only chickens that survived that experiment were the roosters I gave my mom (and I’m pretty sure they were eventually eaten by coyotes). Never one to learn lessons from a gruesome past, this spring I started thinking about chickens again.


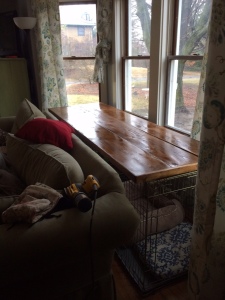
 This is one of those home projects that is entirely about embracing the reality of my life. It isn’t Pinterest or magazine worthy. It simply accommodates my life, in all of it’s glory (note the sarcasm). I am person that lives with two large dogs. This means dog bowls in the laundry room, dog hair in the corners, dog toys littered on the floor, and dog crates that need to be part of my living space. Big unsightly dog crates are not my favorite part of dog ownership but they are a very real and necessary part of my life.
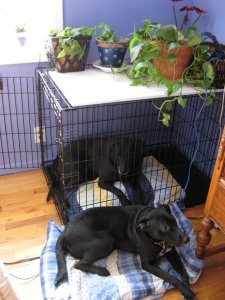 At my old house, I found an ikea cabinet door in the clearance section that served as a crate table to hold my house plants. It was never perfect but we got by with it.
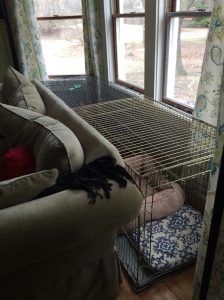
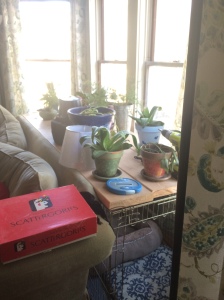


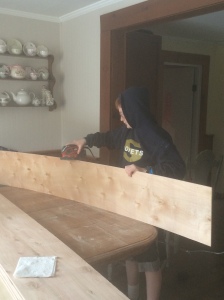
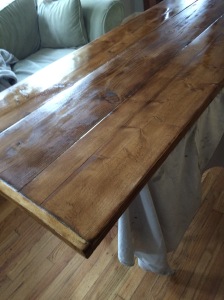 As I mentioned earlier, the boards did warp unevenly over the last six months and the table top is far from perfect but I’m pretty happy with how it turned out. (And yes I realize I have a houseplant problem).